
Seriously, I can't tell you how over the top, beyond words, excited I am about this major step in the bathroom renovation!!
Part of me wants to get into all the gooey, gorey details and show you all 195 pictures that I took during the tiling process, but I won't. I'll give you some of the highlights instead (35 photos to be exact). Thankfully, I refrained from photographing the low-lights. You wouldn't want to witness some of the arguments my dad and I had while doing this project. I can now see why people say "I don't think my marriage would last through another renovation". Although we fought like cats and dogs at times, looking back at the hell it sometimes was, it was a fun project. I don't want to do it again anytime soon, but it was still fun and I can't put into words how grateful I am to have had my dad at my side, measuring and re-measuring, cutting and a lot of the time, re-cutting, in order to make my tile look so good! I also need to give a shout out and thanks to my mom who did an excellent job on the nastiest job of all: wiping the grout. Not surprising, we didn't fight once! :) Anyway, without her help I would have probably had lumps in my grout and air pockets everywhere, but as far as I can see, it looks pretty dang good!
Alright, are you ready for the reveal? Brace yourself people, your right index finger is going to get a workout from scrolling that little ball on your mouse so much. Here goes:
February 4, 2012: It All Begins--prepping the seams with the thinnset.

Placing the tile begins...the prep work for that first Saturday took about 8 hours. I'm not kidding.

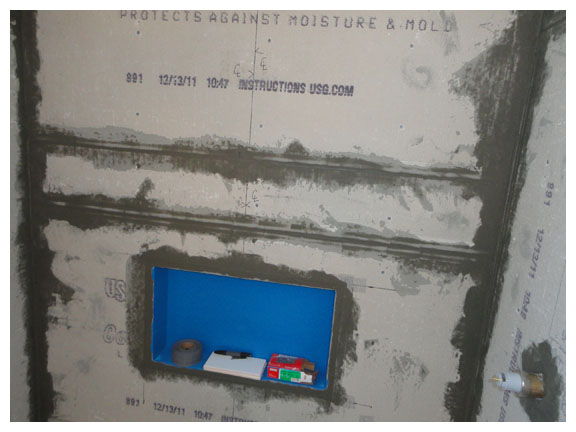
Using that level about 5 billion times and looking at the handy diagram about 2 billion times, two weekends later, we have the first part of two walls done.


February 13, 2012: A stall at the built in. We are not sure exactly what to do about "framing" the built in so it looks right...a trip back to the Tile Shop leaves us with these cool gray marble "pencils" used for things like this. I'd say that not planning correctly for the built-in and the white tile frame that would have went around it was a nice, happy accident. It gives it a little character and it totally looks like we planned it that way! Oh, and don't worry, the tape comes off. We just didn't want those heavy suckers sagging in the drying process and leaving us with a droopy, crappy looking built-in.

February 19, 2012: The tape came off and we were on our way. Next came the installation of the mosaics inside the built-in.


Fast forward to March 15, 2012: All other tiles are up except the little mosaic strip. Look at how even those suckers are. All the measuring and re-measuring and maybe a few re-cutting really paid off!

March 16th, 2012: The mosaic strip goes in and we can call it a day! I am so happy I may have hugged the walls on more than one occasion.


March 17th: Now waaaiiittttt a minuuutee.....you know you make me want to Grout! Kick my heels up and Grout! Throw my hands up and Grout! C'mon now, Grout!


In case you're wondering, I used Whisper Gray grout and the Subway tiles are 4"x16".
Now lets move on to the floor, shall we?
March 29, 2012: After three days of measuring and cutting, the tiles are ready to be laid.


March 31, 2012. You make me want to Grout! Kick my heels up and Grout!...again.
Here's my mom and I grouting again. Me putting grout in, my mom wiping it clean.


April 1, 2012: No joke, the tile is complete! All it needs is a little sealer, some caulking in the corners and where it meets the ceiling and she's good to go! I actually put the sealer on tonight (April 4) and as I was putting it on, all I kept singing was "Signed sealed, delivered, You're Mine"! --see how I changed the words a bit??
Anyway, here the floor is in all her glory. I am not kidding you when I say that I sat on the edge of my tub and just stared at it for 5 solid minutes. Then I may have laid on the floor. Please don't judge me.


Excuse the unflattering angle of my double chin.
This is a more real representation of what color the floor actually is...


And so is this...

And here are a few other randoms. A close up of the mosaic strip that is two feet from the ceiling, on all walls.

And the best I could do with trying to get the bathroom in its entirety.

And for S's & G's, let's just take a trip down memory lane, shall we? Here is what she looked like back in November right before and right as the makeover began:


Wow, even I can't believe it's the same room!
Anyway, there you have it! Stay tuned for the final touches...paint, trim, putting the fan plate on, the sink, toilet and accessories!
Thanks for sticking though this long post!
Absolutely AMAZING Leiann!! It looks incredible! You made such good choices on colors - love, love the cool accent tiles in the shower. And the floor tiles are gorgeous. You hard work really shows - CONGRATS! I think you should have a bathroom party:)
ReplyDelete