Ever since purchasing the electric necessities for the "installing the fan" portion of my bathroom renovation, I've kind of had the Electric Slide stuck in my head. Now that it's finally out on paper, (or technically screen), it will hopefully go away and I can stop picturing myself on the dance floor at a wedding looking really dumb trying to work my moves into that song.
Anyway, the fan is in! Whoop Whoop!! *insert dance moves, me shakin' my tail feather in excitement and a few jumps for joy* My old bathroom did not have a fan, which technically is OK since there is a window in the bathroom, but I figured it would be nice and it will hopefully eliminate any issues like moisture behind the walls, etc. that may occur over the next 60 years when the next owners go to take out tile and end up ripping down all of the walls. :)
Before the wiring was done though, we ended up taking out two plywood type floors that were in the bathroom under the pink tiles. I guess you would technically call one of them a "floor" and one of them a "sub floor"?. Both were pretty yucky and needed to come out. Turns out that it was good it was done that way because another surprise was waiting under both plywood floors--the original floorboards, I guess you would call them, needed work too. Some were really loose and bouncy so they needed some reinforcing from the bottom up..., which meant going down to the basement and doing some major support work from under the floor. It's all good now and once the new plywood sub floor gets laid down, we won't have to worry about those floor boards moving around at all. The last thing you want is a floor that moves around, especially when you are planning to lay tile.
 |
| Sub floor #1 coming up--little by little! |
 |
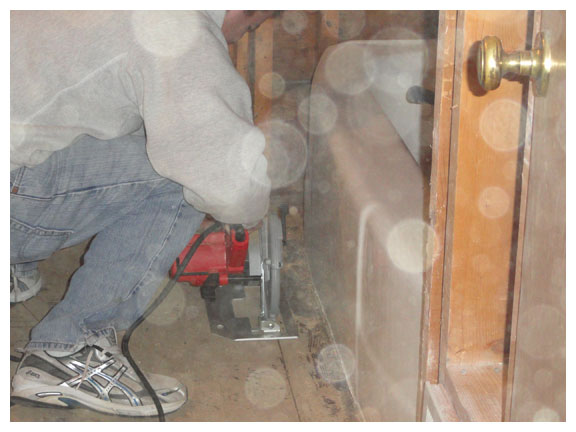
| Floor #2 makin' its way out with the help of Jeff and his handy saw. |
 |
The floor boards showing their not-so pretty face. The hole was also fixed from the
bottom up---no sprained ankles here! |
After the floors were out, it was time to wire. So with the help of a family friend on Saturday, the wiring was done for a brand spankin' new fan, along with a couple other outlets. One being a separate switch that operates the fan, a working, grounded outlet which my bathroom also has never had and is now code these days and another little switch-a-roo with an outlet that was actually on the kitchen side that needed some adjusting and now that the neighboring bathroom wall was free, we were able to get at the kitchen outlet and move it to a new, more useful spot. <-- that last part probably makes little or no sense to you, but if you ever come over and see it for yourself, I will explain. It's much too hard to explain over type and it's technically not part of the "bathroom renovation", so it doesn't even really belong in this post!
 |
| It's Electric! |
 |
It's Electric part II. Ignore the almond colored light plate--that was for the kitchen side. My bathroom
light plates and switches will all be bright, shiny and white. |
 |
| New fan switch on the left, new grounded, working outlet on the right. |
 |
Another view of the outlets just because I love them so much and the 2x4
with all of the names of the bathroom helpers to date. Looking at that now, I realize
my Grandpa needs to be added to that list. |
 |
Mr. Fan in all his glory hangin' up by the ceiling. Don't worry, Buddy, we'll get a face plate on you as soon
as your insulation and drywall friends are hung up around you.
|
Next on the agenda: Insulation for the outside wall, new pluming for a stand up shower (did I ever mention that I have had to use one of those hand held sprayer things when I showered in this bathroom? It never had an actual shower head, just a sprayer attached to the faucet. I had to one-arm shower for over two years! It will be nice when I can rinse my hair out with both hands again!) and then laying a new sub floor. Not necessarily in that order, but you can bet I will keep you posted.
Stay Tuned....


