
250 days, 700+ pictures and a few emotional breakdowns later, the bathroom is done!!!


I decided to forgo the "storage" above my toilet. The space was too small to force something in there that didn't belong. I decided I could keep my face wash and other things in my future old/new medicine cabinet or the linen closet outside the bathroom. I also knew that I needed somewhere to put the two decorative items I bought months and months ago, knowing they would someday call the bathroom "home". And the little owl my dad got me while out of town that he thought would look good in the new bathroom also needed a little perch to sit on. I am SO glad I did it this way instead of a clunky storage thing.
The shelves were actually a box/crate thing that I got from the Container Store. I planned on flipping the shallow box/create and screwing the bottom to the wall and using the edge as the "shelf". It ended up being too big, but between my mom and I, we decided that the length and thickness of the box edges would be the perfect size for shelves. I asked my grandpa take the box apart with his table saw and I took two of the sides, sanded them, put a coat of primer on to give them a washed out look and created shelves. I figured finding delicate brackets would be simple, but of course I was wrong. Then one day I came across these old, paint-covered hinges in an antique store and had an idea. I asked my grandpa weld them at a 90 degree angle so they could be used as brackets. I planned on leaving the cracked, thick paint as is, but after the welding I realized how gunky the paint actually was and stripped it off. I was so glad I did because I love the dark color of the hinges and the delicate detail that was uncovered under all that paint!

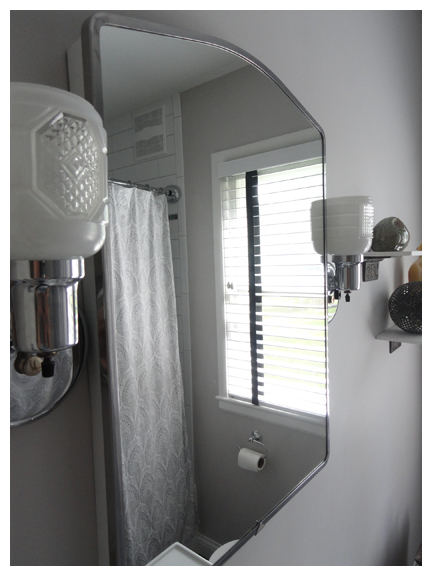
While we're not on the storage subject anymore....my original medicine cabinet is back! I am not sure if I mentioned this before in a different post, but my plan was always to keep the medicine cabinet/mirror and the lights on either side, original. That almost came true. There was a minor mishap when trying to get the mirror back into its frame. I won't mention any names, but hopefully my brothers 7 years of bad luck won't start anytime soon. Luckily we have a family friend with a mirror business so he was able to make me a replica, sans the etched flower on the top. And my friend Nick who did the drywall also graciously took the old, rusted, paint covered cabinet portion and made it look brand new! He put bondo in places I never thought possible and gave it a few fresh coats of paint. I swear, you would never know that that "box" had a stamp on the back that's dated 1952! There were some rust spots on the back of the door that wouldn't come off so I decided to jazz it up with some patterned contact paper from Target. As for the lights on either side of the cabinet, those guys are still original and add that "vintage" touch along with the faucet handles, medicine cabinet and hinges-turned-brackets.

The rug was from Talking Squid on Etsy. I had seen a rug made from T-shirts months and months ago on Pinterest. I attempted to make one myself but realized after I started that the project would take longer than the entire bathroom renovation itself, so I turned to the internet. I love the way it turned out and would highly recommend this girl if you ever decide to get one for yourself!

The shower curtain, although not what I orginally planned, is from Target and the tray and containers that sit on the back of the toilet are also from the Container Store.


The blinds are from Menards and are white wood. I decided to go with black fabric strips as accents for a little more pizazz.
And last but not least, this is a little something I created in honor of my Grampy. He didn't make it to see the final reveal but was extremly excited when he saw the tiles and fixtures in their boxes. I hope he likes how it turned out! He always said "Be Good", so Grampy, this is for you.

There you have it! For Old Time's sake, let's take one last before/after glance, shall we? Oh hell, I'll even throw in some never-before-seen footage for you!


Wow, after looking back at all these pictures, posts, excuse my French, but Holy Shit! I can't believe how much was accomplished! Thank You to everyone who helped with this project, both physically or if I just ever needed an ear to talk or vent to! I owe you one!


And one final glance....


Oh my gosh- that looks amazing Lei!!!! Do you wanna come do my basement bathroom for me now ??? haha!!! Good job!
ReplyDeleteThank you!! :) Yes, if you have like 8 months to spare, I could try to do your bathroom. hah!
DeleteA-MAZ-ING!! I can't believe the difference! Love the colors and the blinds, the wallpaper detail on the back of the medicine cabinet, the built-in in the shower, the cool antique shelf holders...Nice job!!
ReplyDeleteHave you relaxed in the bathtub with a beer yet? I think you should:)
I love the custom touches! The Grandpa-inspired print...tear :)
ReplyDeleteI really love the information. It was such a wonderful picture taken a long time ago. Thank you for sharing. drywall contractor near me
ReplyDelete